The evolution of an image by definition is taking the image that was well lit, nicely posed and appropriately executed in camera and transforming the image into a piece of art by merging the photographers vision and post-production (circa 1990’s the darkroom) to create the final image.
Some photographer have the luxury to get everything right in camera, but most of us do not own an expensive and elaborate studio filled with multimillion dollar lighting setups with cranes, assistants and well . . . nice gear. Most of us make due with what we have.
The image below (straight out of the camera) is of Krupa and Ronak a beautiful couple getting married in Cancun later this summer. As a stark contrast to the beautiful beaches and ninety degree weather they wanted their engagement session in the snow. With the vision of creating images that show our couple having fun and all alone on a mountain.
Unfortunately there is no such thing as snow where we live so we met our clients at a ski resort. However the issue with ski resorts is well it looks like a ski resort! Something we did not want to portray in the final image, so we waited until there were not too many people on the slopes and took the photograph.
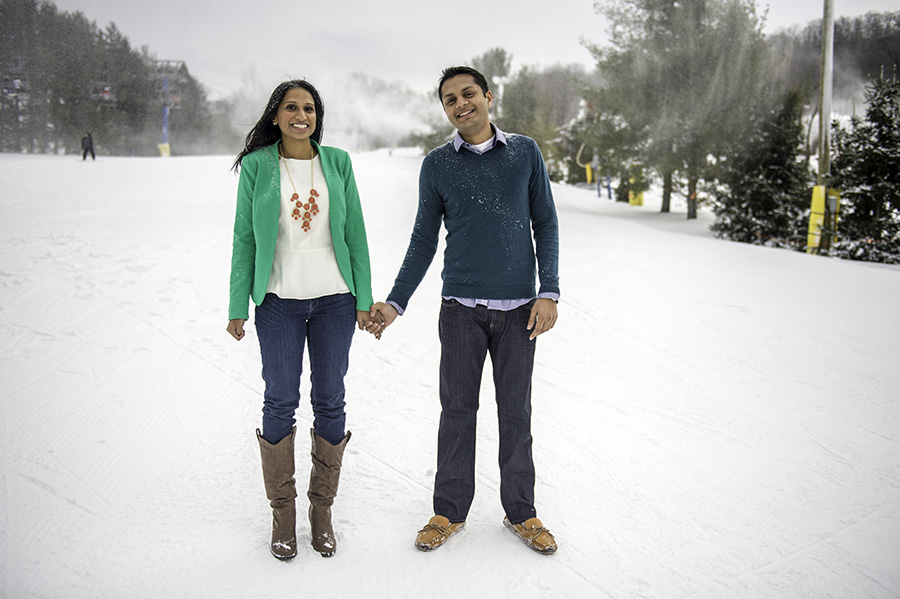
(Image settings: ISO 200 36mm F2.8 Shutter Speed 1/4000)
Right away you can see some major issues with the image including the yellow safety pads, the ski lift and person skiing – all items that detract from the image and do not meet the vision. In post production we removed the skier in the top left of the image using the clone tool, removed the ski lift on the top left using a combination of the clone took and the healing brush, next remove the safety bars and wooden poles that show off the resort type look. Then we added a little more snow dustings, trees and bushes to make the scene look more mountain like.
From there we simply lightened our couple as they were under exposed against the snow, added additional detail to the snow, white balanced the image and created the final image.
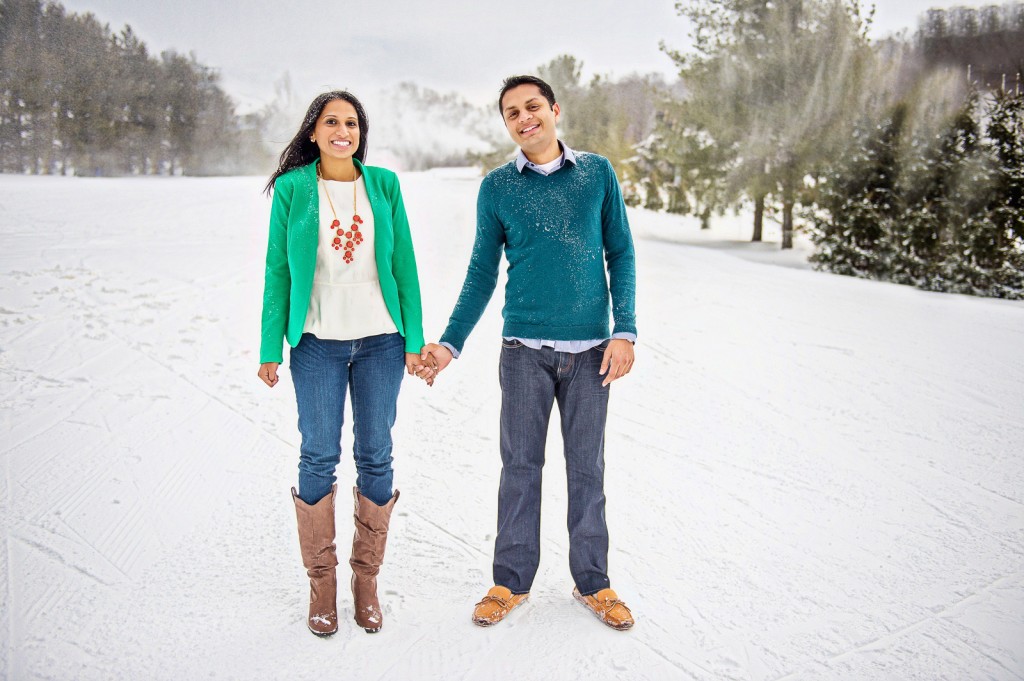
Another example below:
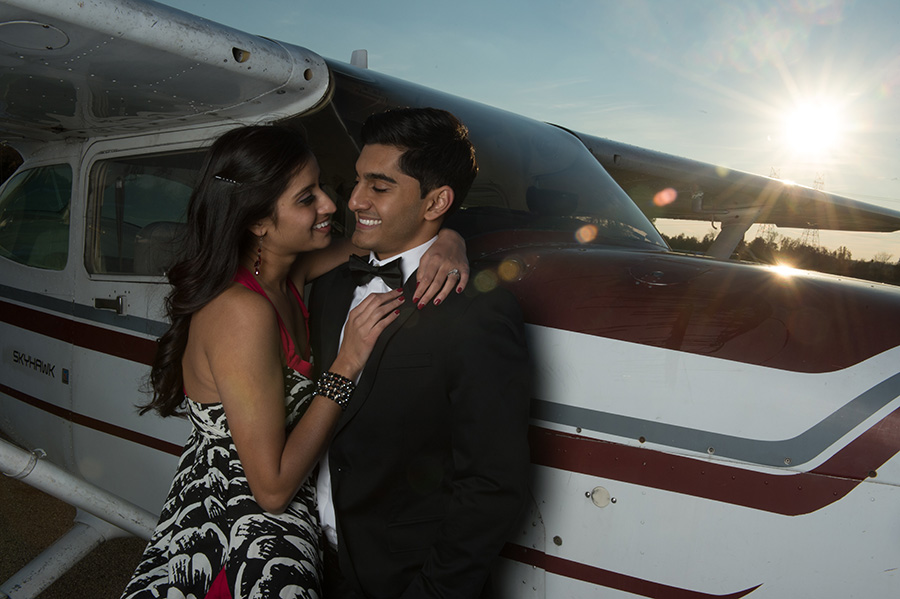
(Image settings: ISO 320 38mm F22 Shutter Speed 1/200)
The image above was taken using an elinchrom quadra lighting system, the lighting unit can go up to 400 watts however trying to overpower the sun at high noon is a bit of a challenge regardless of what system is used. As you can see in the image our couple as well as the plane is slightly under exposed, additionally we do not have the deep dark blues in the sky as we had hoped for.
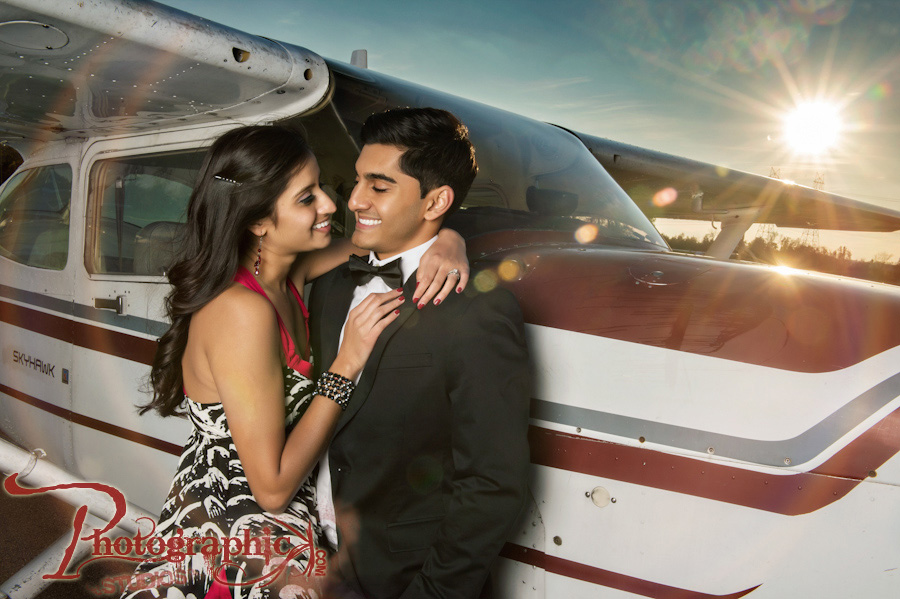
So in post-production to ensure that the image matches our vision we darkened the sky to ensure the sun and the sun flare stand out this was done by increasing the contrast. Next we brightened our couple and the plane using levels with a mask. We ran Imagenomic Portraiture to smooth the skin slightly and then added our own sunflare to the left of the image to simply add a little more interest to the image and draw the viewers eye to the couple.
The goal of every photographer is to get every image right in camera, but when the image does not match the vision post production can bring the image closer to perfection.
